Choosing the right test reporting tool is an essential step for any organization looking to optimize their testing processes and enhance software quality. Your choice should be based on multiple factors such as ease of use, integration capabilities, customizability, and of course, the most important factor – a comprehensive set of features.
ReportPortal offers real-time reporting, data visualization, integration with different test frameworks and bug tracking systems (BTS), compatibility with CI/CD pipelines, and some intelligent features for smarter and faster test results analysis. One of these features is Auto-Analysis. Here are the key tips for using it effectively:
Analyze the tests that failed in the first run
Use Analyzer settings
Use Auto-Analysis with "Make Decision" modal
Track the history of changes in the "History of Actions"
Use BTS along with Auto-Analysis
1. Analyze the tests that failed in the first run
To operate the Auto-Analysis, manually analyze the test results of the first run. Afterwards, based on these data, Auto-Analysis will automatically assign defect types in subsequent runs.
Search for the similar "To investigate" items and Unique Error Analysis features will help you to analyze the results faster.
If you inaccurately identified the defect type when analyzing the results of the first run leading to Auto-Analysis consistently labeling an issue as a Product Bug, for example, when it is actually an Automation Bug, you can manually adjust the defect type to Automation Bug through the "Make Decision" modal. During the subsequent run, Auto-Analysis will then label it as an Automation Bug.
2. Use Analyzer settings
Adjust all necessary components within the Analyzer settings, ensuring it suits your needs and enhances its usability.
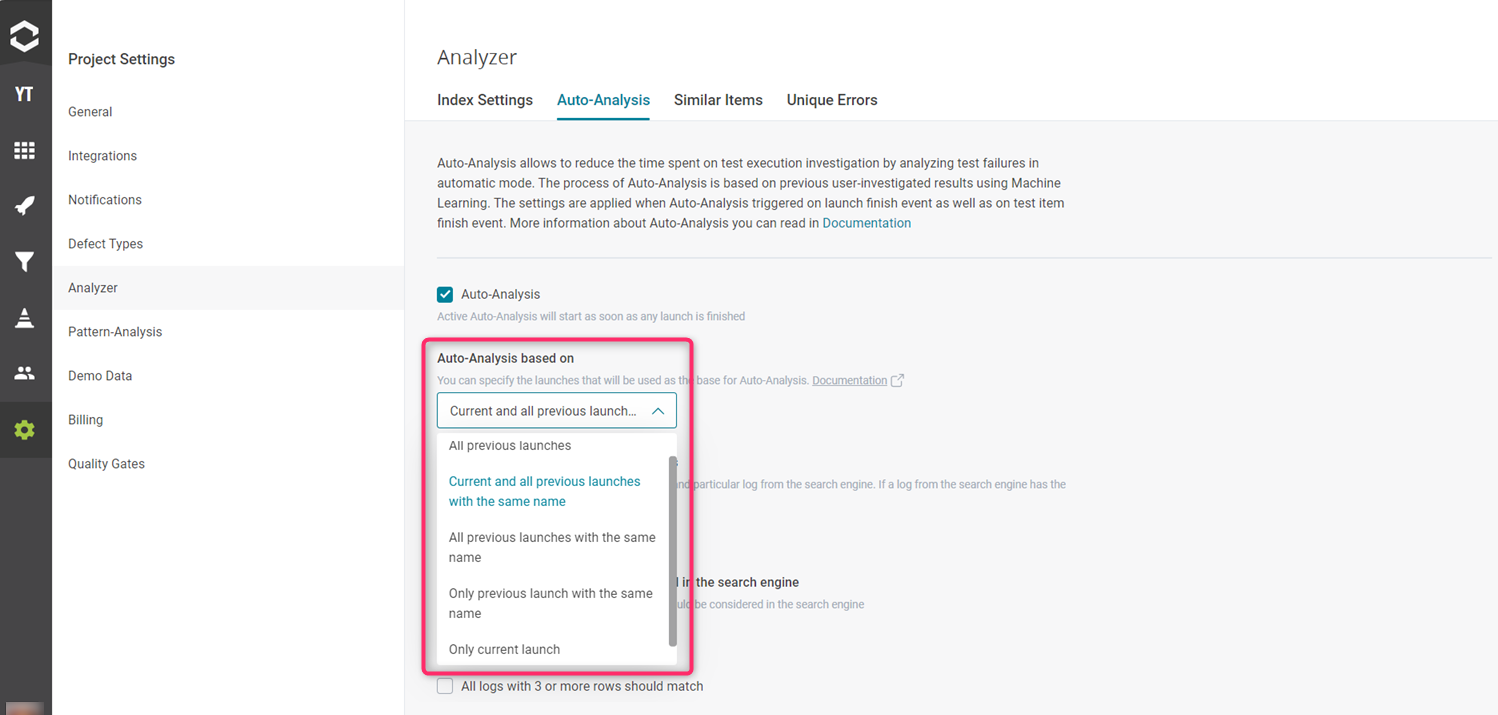
Firstly, specify which launch you wish to use as a base for Auto-Analysis.
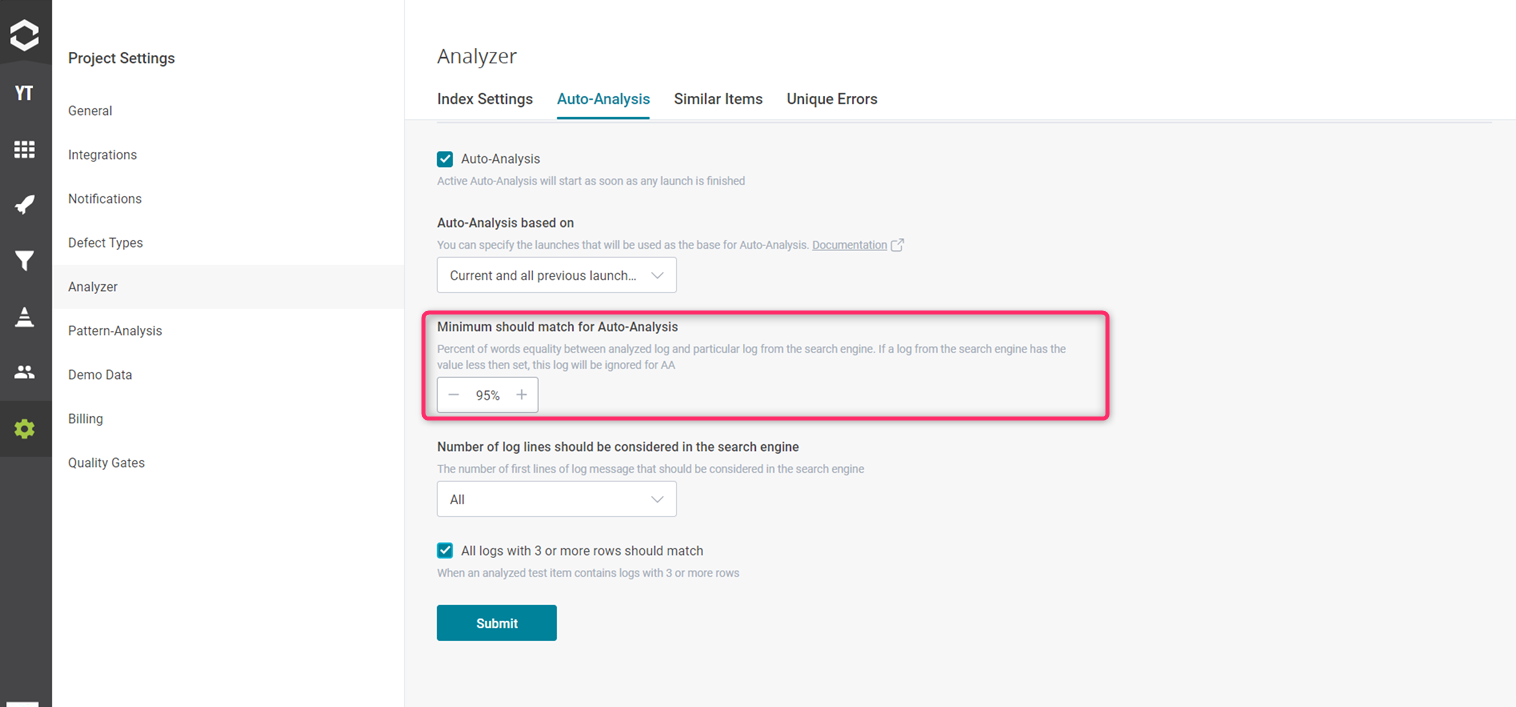
Following that, indicate the minimum percentage match between the log being analyzed and other logs being compared with it. If you require maximum accuracy, set a higher percentage. However, to understand how Auto-Analysis generally operates, you can lessen percentage value.
The default setting stands at 95%. This is the recommended similarity to prevent any future confusion regarding what the Analyzer may have misinterpreted, and to maximize confidence that everything has been correctly identified.
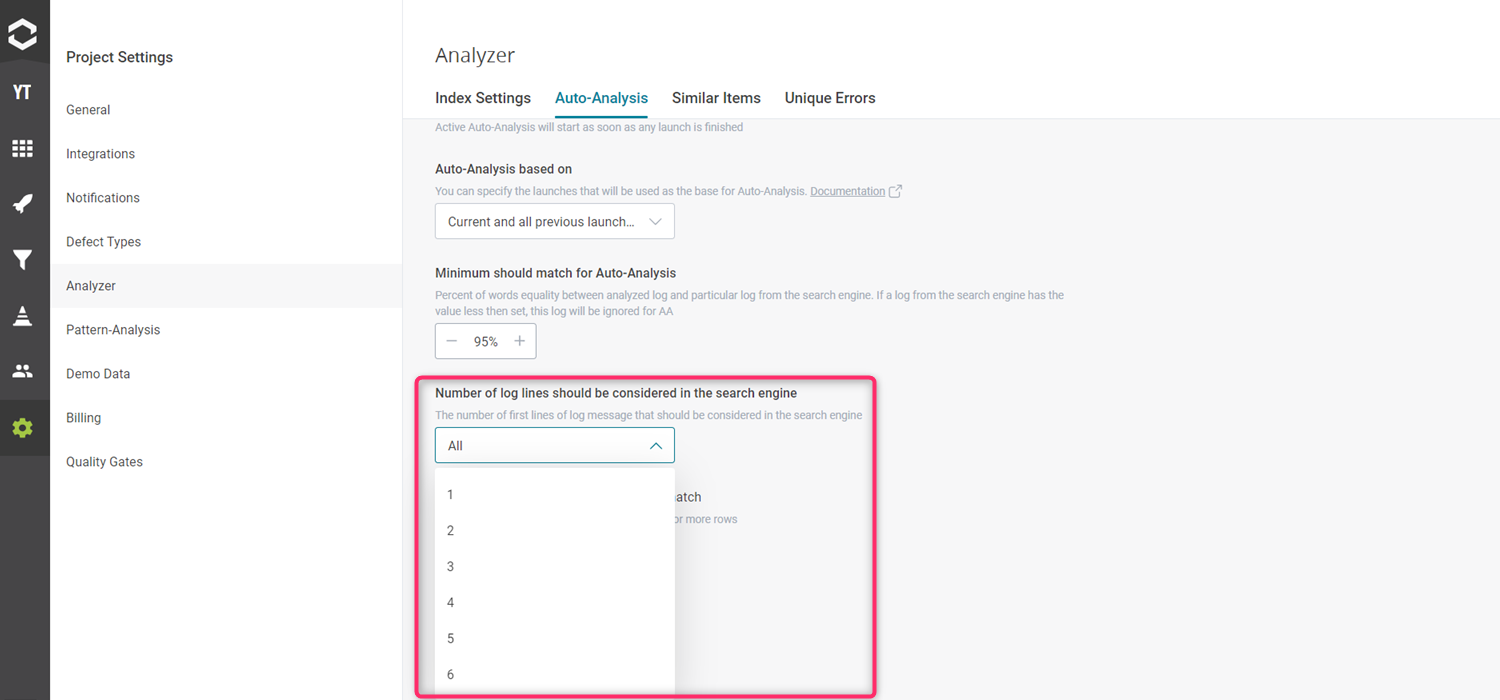
Next, determine the number of log lines to consider. Should it encompass the entire log, or merely a few lines, particularly if the root cause of your test issues is concentrated in the initial log lines followed by some stack trace?
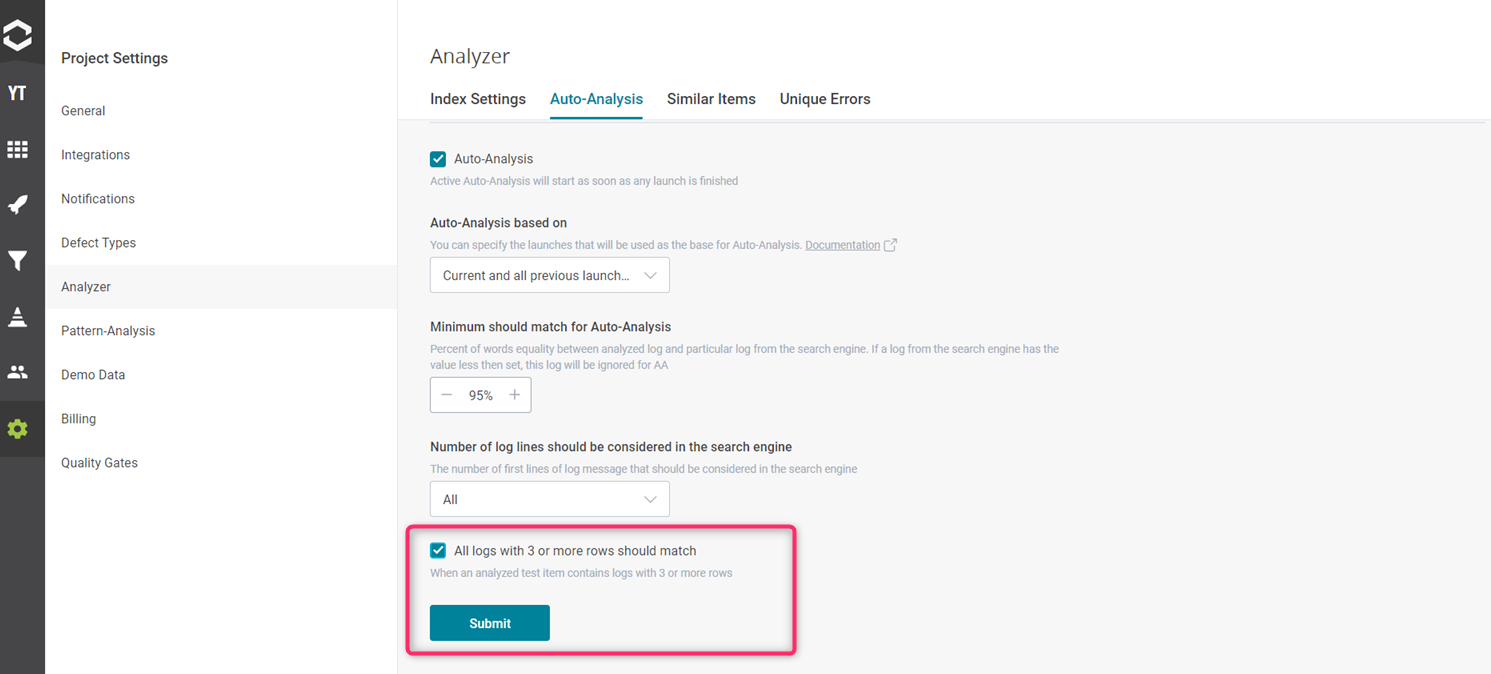
Following this, consider whether you want Auto-Analysis to involve smaller logs. When the checkbox "All logs with three or more rows should match" is checked, Auto Analysis will consider only the first three log lines to compare logs.
3. Use Auto-Analysis with "Make Decision" modal
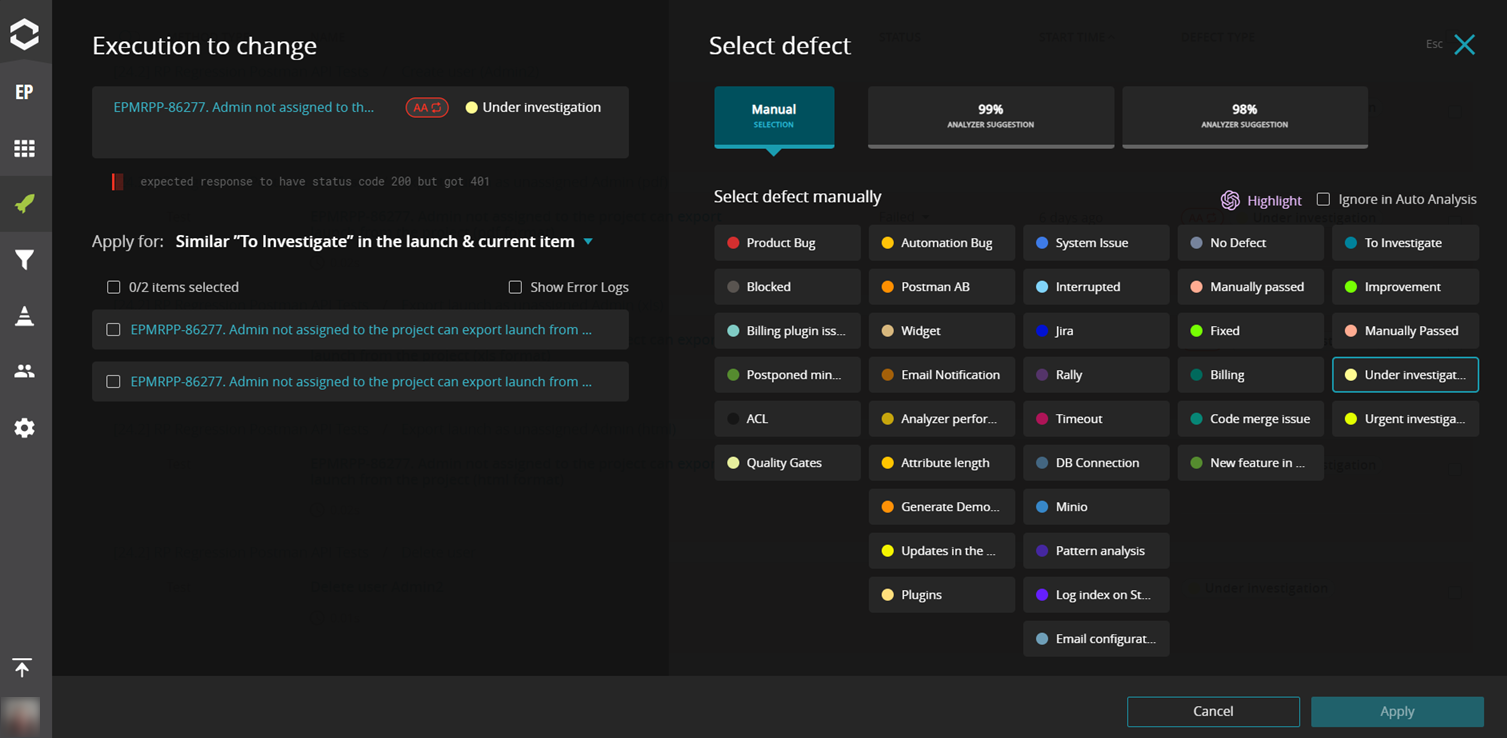
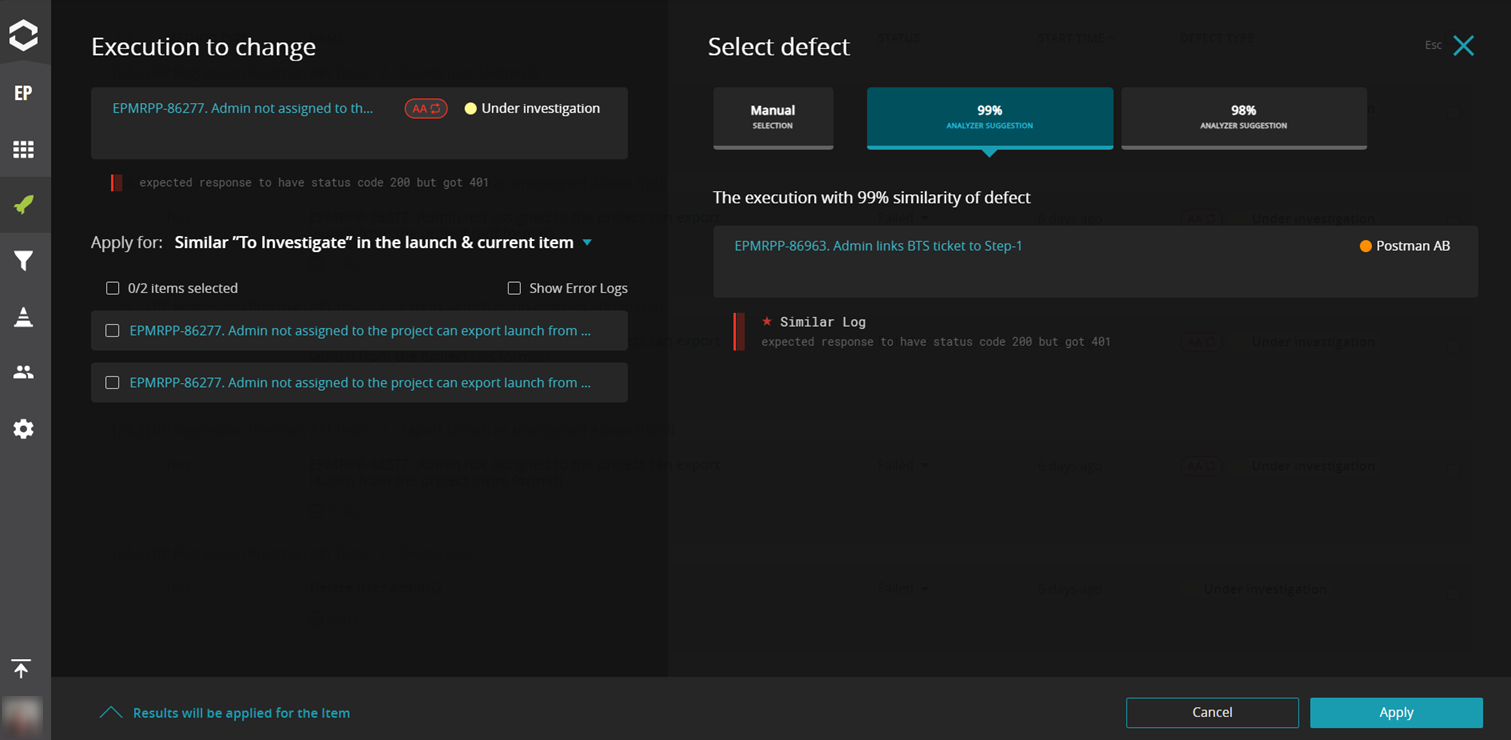
You can also make the decision on your own – in "Make decision" modal, select the necessary defect type for the failure. ML Suggestions functionality can assist you.
4. Track the history of changes in the "History of Actions"
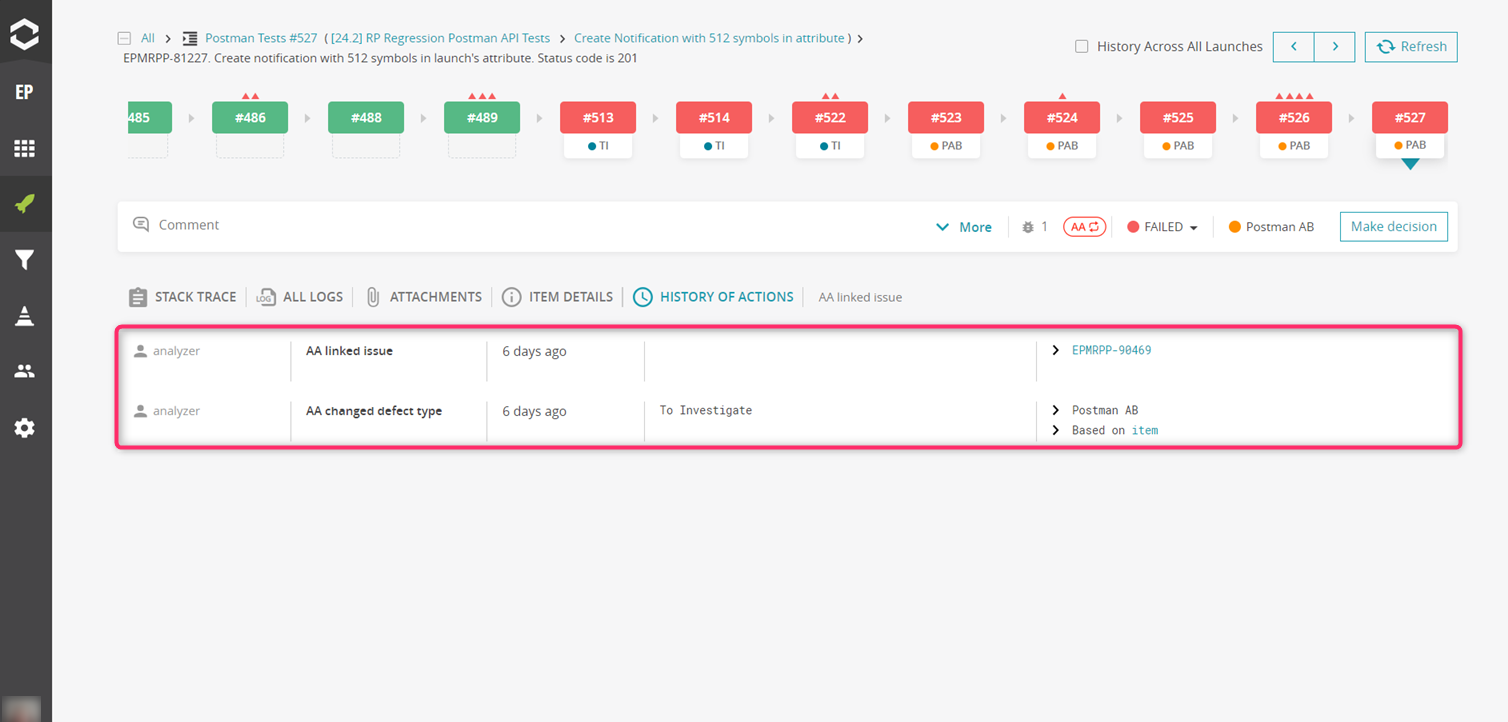
This function allows visibility of all actions taken with the test item, such as when and what type of defect was assigned and based on which item.
5. Use BTS along with Auto-Analysis
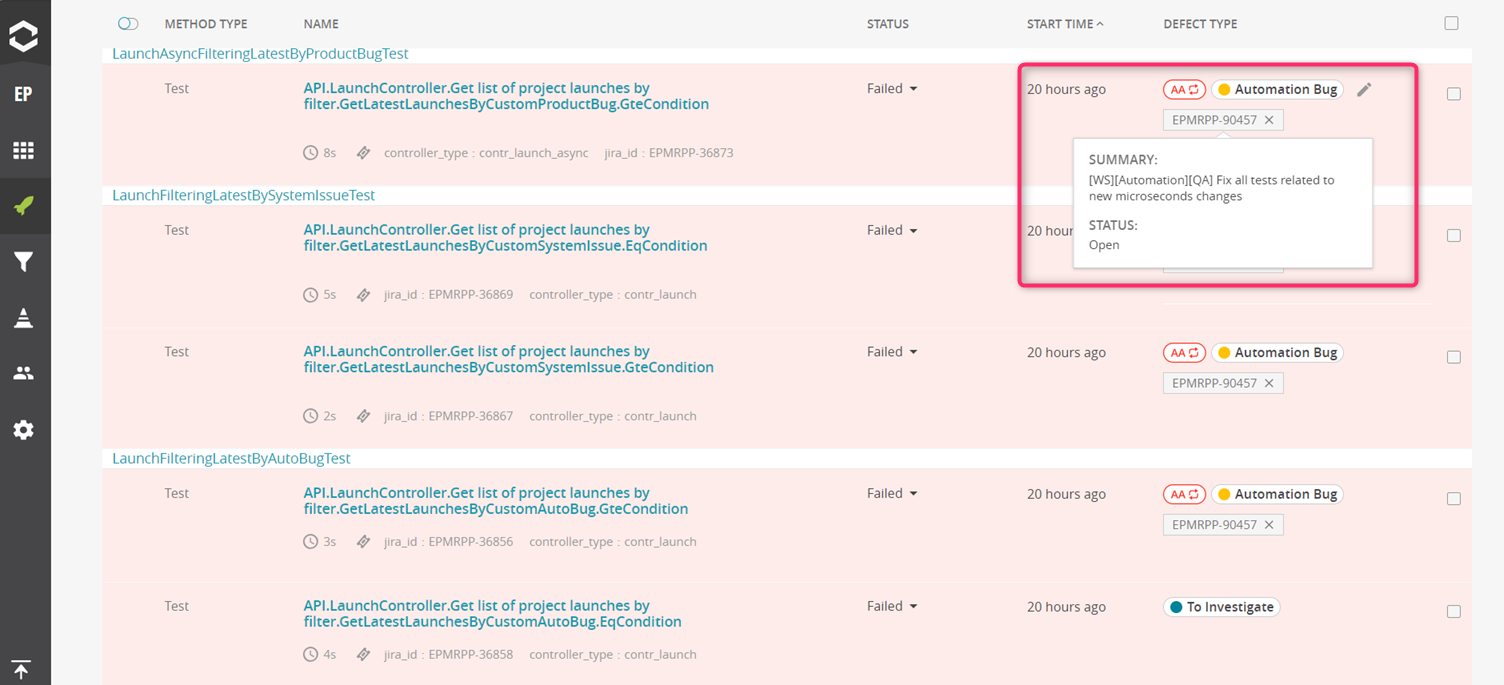
If you created a bug in BTS and linked it to the test item, Auto-Analysis will not only assign a defect type for the failed test in future runs but will also attach a link to the corresponding issue in BTS. This is highly convenient as it allows you to view the bug and its status instantly.
Thus, the Auto-Analysis feature uses AI algorithms to analyze test results automatically. It allows to focus more on testing strategies and improvements rather than spending time on manual analysis. With this innovative feature, you can speed up testing processes, improve accuracy, and ultimately deliver high-quality software products.
You can find more information about test automation results analysis in our documentation.