Standard defect types like "Product Bug" or "Automation Bug" are helpful, but sometimes they just don’t tell the full story. That’s where custom defect types come in. They let you be more specific about what went wrong and who should investigate it. During defect triage, this can really save time – no need to figure out what type of defect it is (for example, "Java Migration Issue" or "Not Implemented"). You can mark issues that need investigation, flag known third-party problems, or highlight test failures that aren’t actually bugs.
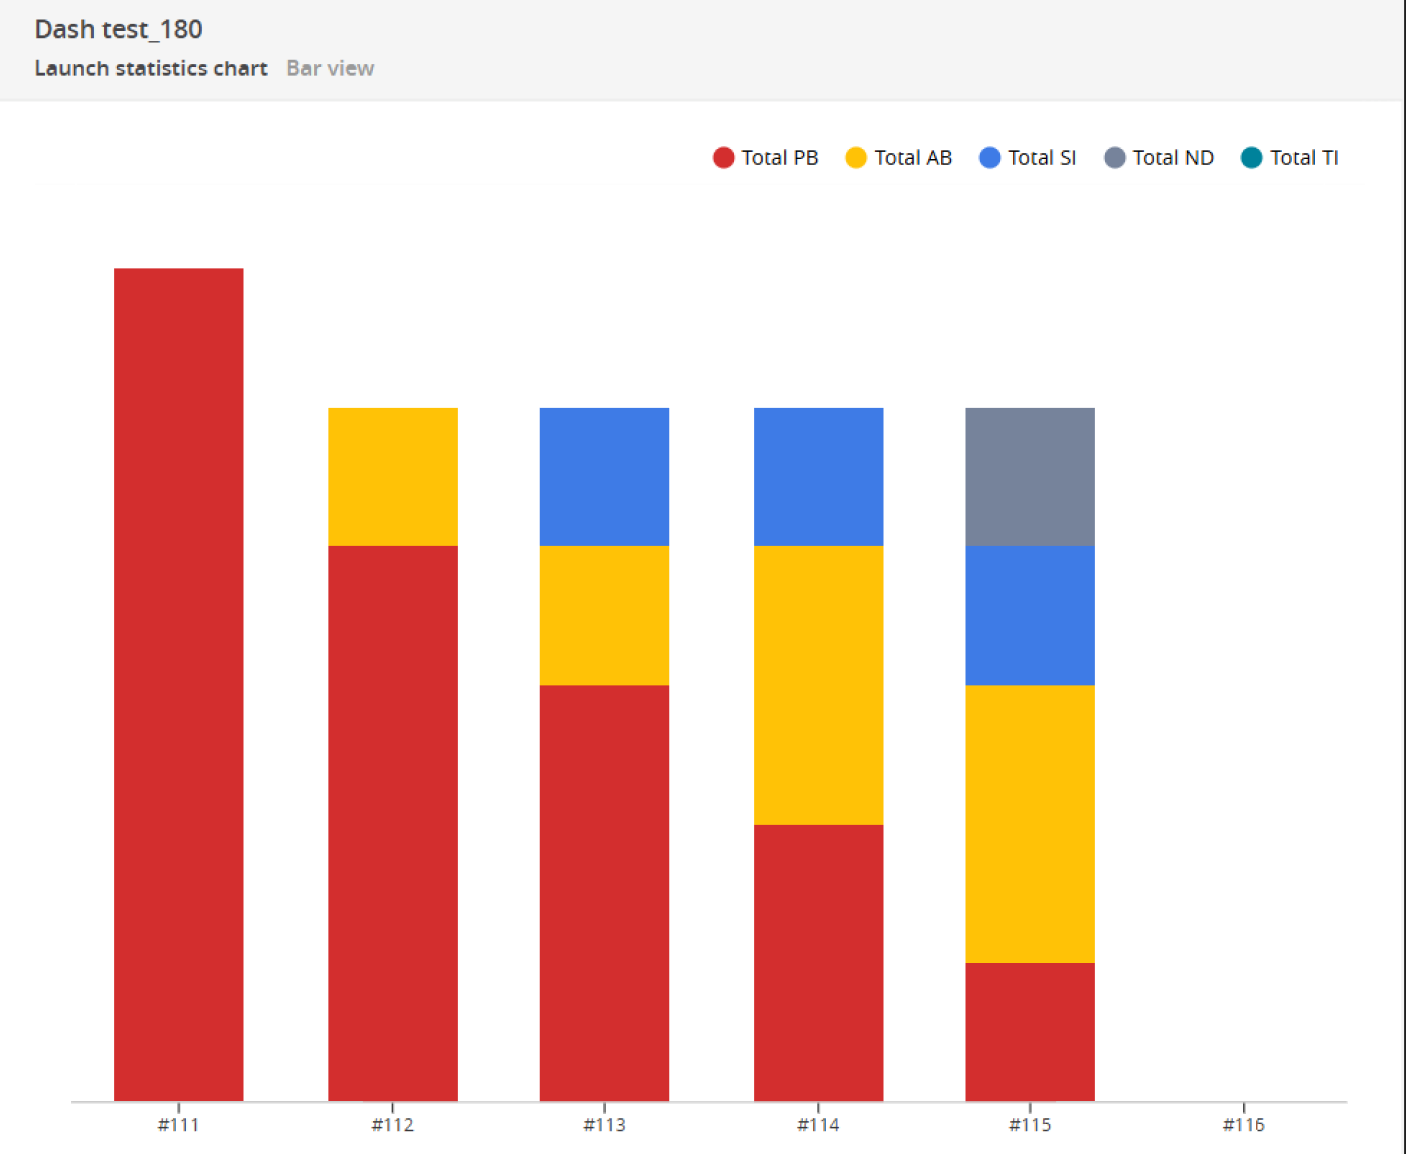
Thanks to custom defect types, you can highlight trends and product areas where defects were occurring. For example, in the screenshot below, you can see how failures are distributed across the main defect type groups. You can also observe that the number of Product Bugs decreases with each run, while the number of Automation Bugs increases – however, in the latest launch, all tests passed.

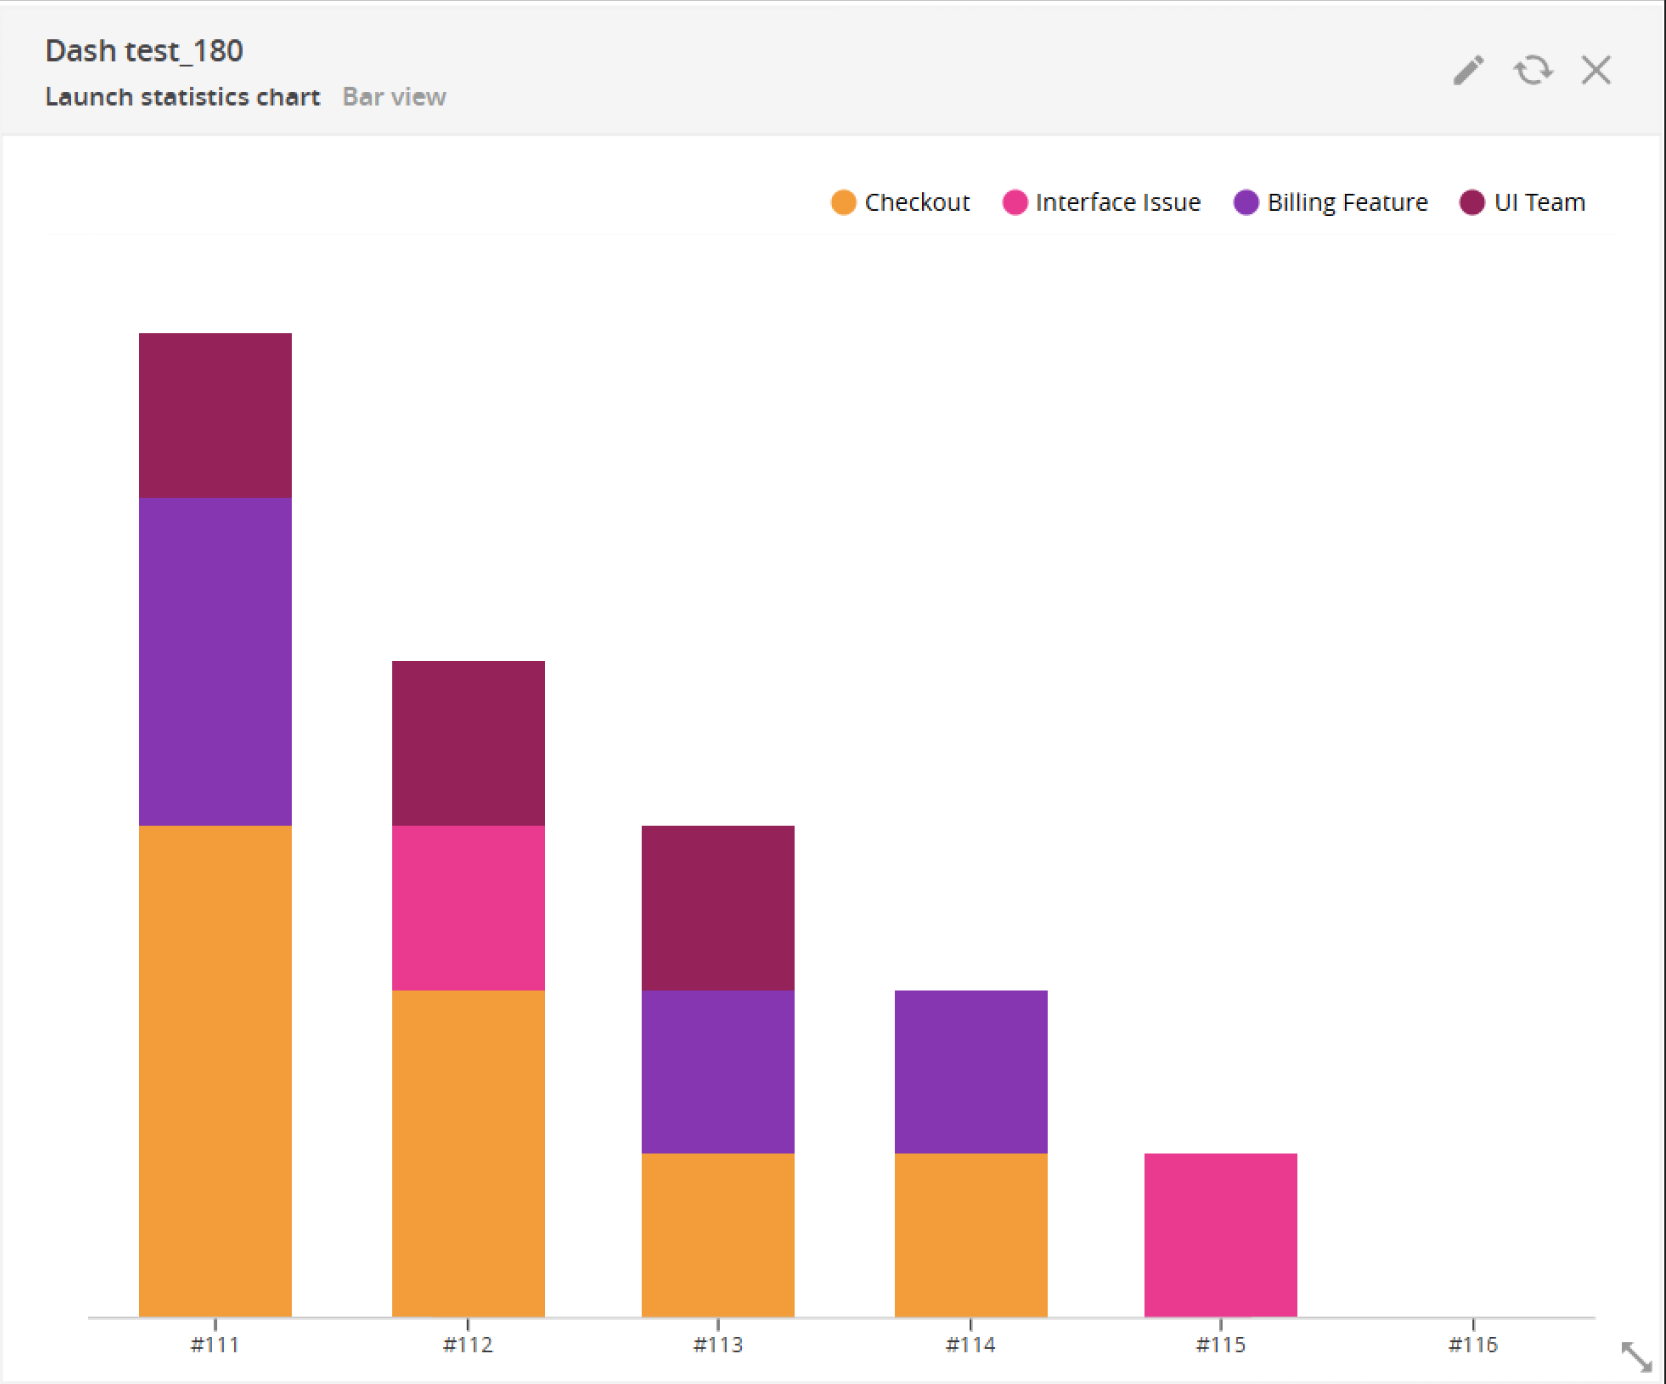
And in the screenshot below, you can see the distribution of Product Bugs by custom defect types, which helps focus attention where it’s most needed. For example, most of the issues are related to Checkout.

Look at the examples below to see how custom defect types can make issue handling faster, clearer, and more organized.
Custom "To Investigate"
We recommend using these custom defect types during the defect triage process when you need to assign someone to investigate a failed test. The idea is to make it clear who is responsible for inspecting the issue.
Let’s say you are dealing with a common third-party billing problem. Create a custom defect type "Billing Vendor" within "To Investigate" issue type specifically for this case and notify the vendor. This shows the failure has already been passed on to another team, and now you are waiting for their input.
Using this approach helps everyone stay on the same page, especially management. It is immediately obvious that the failure is not just sitting there unassigned – someone is already on it.
Once the root cause is known, the issue can be reclassified into its final state: System Issue, Product Bug, Automation Bug, or No Defect.
Examples: Third-party Billing, Third-party API – Pending Analysis, Issue for James Cooper, To Clarify, QA Investigate, Dev Team Investigate.
Custom "No Defect"
Not every test failure is the result of a bug. Take this example: the billing service was down for planned maintenance during your test run. The vendor had notified you in advance, but your tests were still scheduled and ran anyway – of course they failed, but the reason is known.
In this case, you can create and use a custom type like "Third-party Maintenance" under the "No Defect" group. It helps your issue statistics clean and accurate.
Other useful types in this group: "Manually Passed" or "Passed Locally" – for those times when a test fails in CI but passes just fine on your machine.
Examples: Third-party Maintenance, Manually Passed, Passed Locally, Aborted, Interrupted.
Custom "System Issue"
System Issues are often symptoms of deeper problems. For example, you might be unable to run some tests because the third-party vendor hasn’t provided a stable test environment.
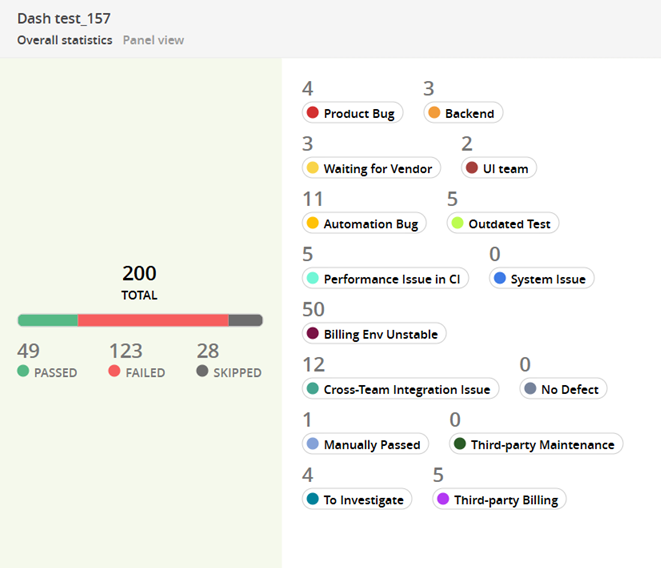
Custom "System Issue" defect types help you track recurring problems like this. Instead of having to explain every week that 50 tests failed due an unstable vendor environment – and spending 10+ hours re-running them – you’ll have hard data to show where the time is going. Just create a custom "Billing Env Unstable" defect type and then build an "Overall Statistics" widget.
In the screenshot below, you can see the distribution of failures by defect types, with most of the issues related to "Billing Env Unstable".

Sometimes the problem isn’t with the third-party vendor, but with another internal team. For example, you might be developing the Product Catalog while a neighboring team is working on the Shopping Cart. If your tests that verify adding items to the cart start failing, create a custom "Cross-Team Integration Issue" defect type to tag these cases and discuss with the team responsible for that part of the functionality how to stabilize your tests.
Examples: Billing Env Unstable, Cross-Team Integration Issue, Loading Issue, Performance Issue, Integration Issue, Platform Issue, Email Configuration.
Custom "Automation Bug"
Custom "Automation Bug" defect types help break down what exactly went wrong on the automation side. Not every automation bug is caused by bad test logic. Sometimes the test environment is causing problems – performance issues, flaky services, etc. In situations like that, use a custom defect type that reflects it properly.
Or maybe the test itself is outdated. Before/after methods no longer work, credentials have changed, or the test data needs a refresh. In that case, a specific type like "Outdated Test" or "Invalid Test Data" makes things easier to track. If test data is a regular headache, you might want to look at TDspora.
Examples: Performance Issue in CI, Outdated Test, Invalid Test Data, Test Script Issue, Framework Issue, Postman Issue, Under Review for Resolution, Flakу Test.
Custom "Product Bug"
Use a custom "Product Bug" defect type to specify which component is affected, such as "Signup Issue" or "Checkout".
This approach works well if you just need to quickly find failed test cases for a specific component and fix them as a priority. But if you have a lot of components and need to prepare a report for the Quality Manager, it might not be the most efficient way. That’s why we also recommend adding components as attributes and using the "Component Health Check" widget for deeper analysis.
Also, use these custom defect types to indicate who is responsible for fixing the bug. If you’re blocked while waiting for a third-party vendor to complete their part, be sure to label it clearly – for example, "Waiting for Vendor".
Examples: Backend Issue, Waiting for Vendor, Signup Issue, Checkout, Billing Feature, Interface Issue, Known Issue.
In short, custom defect types make the whole debugging process a lot smoother. They help keep everyone aligned and make your data more useful for analysis.